Now, let’s see how to use the native iPhone Recorder to record your iPhone screen.
Enable Screen Recording in Control Center
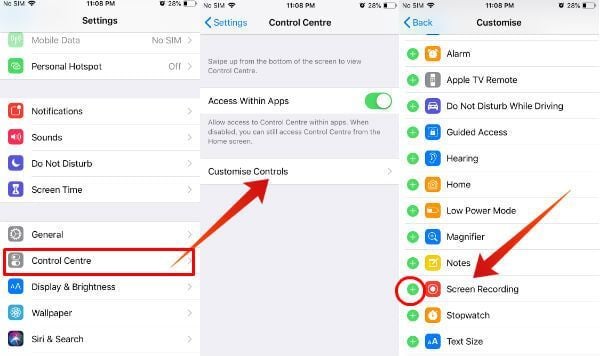
First, you need to enable the Screen Recording feature on your iPhone or iPad by following the first three steps. Then, iPhone Screen Recording is enabled and can be launched from your Control Center. Let’s see how to activate and start the iOS screen recorder on iPhone or iPad Screen.
Also read: How to Record iPhone Screen with Control Center
How to Record iPhone Screen with Control Center
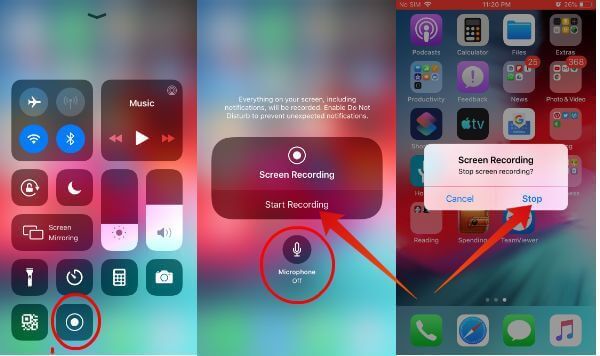
Now, you would be excited to view your recording. Right? Go ahead and launch the Photos folder on your iPhone or iPad. Then, tap Albums->Videos to view your screen recording video. Like any other video, you can share, edit or do whatever you wish with this video file.
Record iPhone Screen with iOS Screen Recorder
This is a pretty simple step to install the iPhone screen. You can do the same screen recording on the iPad if you have iOS 11 or above. The video will save into the Photo album. This is coming handy for programmers, video gamers, and tutors who want to save the iPhone screen activity. Notify me of follow-up comments by email. Notify me of new posts by email.
Δ